How to Secure a Heavy Load with Ratchet Straps

Time:2026-10-30 Author:Mason
0%

How to secure a heavy load using ratchet straps begins with a simple check: can the cargo shift, tip, or roll? Picture a steel toolbox resting on a trailer bed. A loose strap may look tight, yet one sharp turn can expose a poor anchor point or unstable load. Start with the cargo, not the ratchet.

A useful rule of thumb from cargo-securement training is, “Keep the load stable before you tighten the strap.” This is practical guidance, not a quotation attributed to a named expert. Use straps rated for the task, inspect their webbing and hardware, and choose sound anchor points. Frays, cuts, bent hooks, or unreadable working-load-limit labels are reasons to stop and replace equipment. Small details matter.

Place each strap so it restrains movement in the direction the load could travel. Protect webbing from sharp edges with suitable edge guards. Tighten until the cargo is held firmly, but avoid crushing fragile items or relying on the ratchet to correct an unstable stack. Then check the load from several sides. Does anything rock? Can a strap slip off an edge? Fix that before departure.

Recheck the straps after the load settles and during the trip when it is safe to do so. I have seen a snug-looking strap loosen as cargo shifted; appearance alone is not proof. This guide will walk through preparation, strap placement, tensioning, and inspection, while noting when a load needs a different securement method or qualified help.
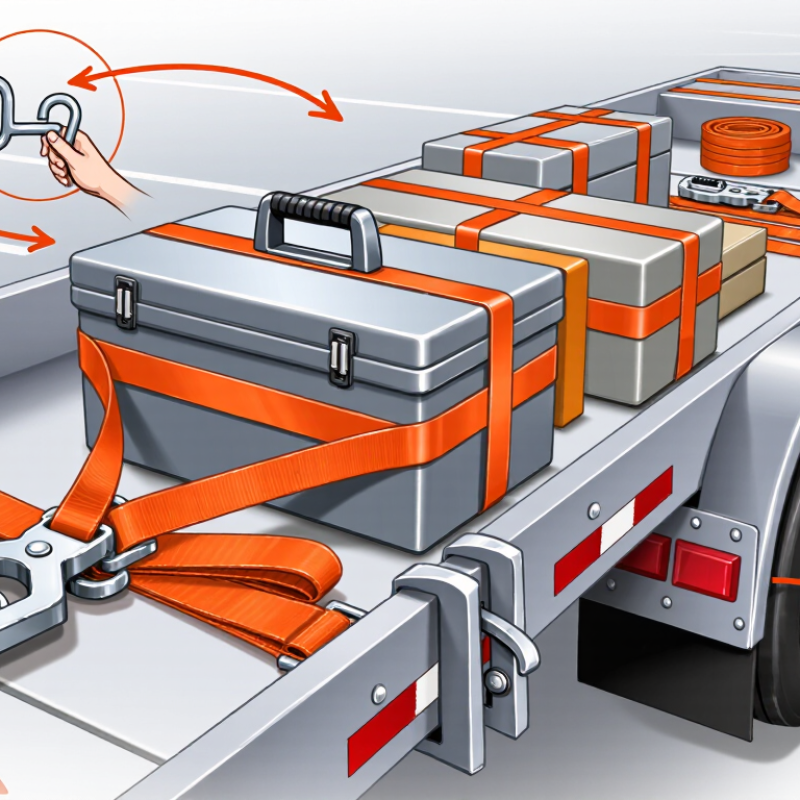
How to Secure a Heavy Load with Ratchet Straps

Assess the Load and Select Properly Rated Ratchet Straps

Assess the load before choosing ratchet straps. Estimate its weight from shipping records, a scale ticket, or equipment specifications; visual guesses can be misleading. Check the load’s shape, center of gravity, edges, and approved anchor points. A tall steel cabinet may shift differently from a low pallet, even at the same weight. Small details matter.

Match each strap’s labeled working load limit (WLL) to the load and tie-down arrangement. Do not confuse WLL with breaking strength. The U.S. Federal Motor Carrier Safety Administration’s Cargo Securement Rules (49 CFR 393.106) generally require aggregate tie-down WLL of at least 50% of cargo weight; specific cargo and securement conditions can change requirements. Rules also vary by location. Count only compatible, properly connected tie-downs, and protect webbing from sharp corners. A damaged label, frayed edge, or bent hook is reason to replace the strap. I would recheck the setup after tightening; a neat-looking strap can still sit at a poor angle.

Tips: Confirm the WLL tag is readable. Use edge guards where webbing contacts metal. Keep straps clear of twists, then test for movement by pushing the load firmly.

Position the Load and Protect Its Contact Points

Place the load low and near the center of the trailer or truck bed. Keep its weight balanced from side to side, and leave no heavy item perched on an edge. Check that the cargo cannot roll, slide, or tip before tightening any straps. A small shift can loosen a strap during the trip. It happens.

Choose strap paths that hold the load down without pulling it sideways. Keep each strap flat and untwisted, with the ratchet positioned where you can operate and inspect it safely. Avoid routing webbing over sharp corners, rough metal, or narrow edges. These contact points can cut or fray the fibers, even when the strap looks sound at a glance. Use suitable corner protectors, edge guards, or padding between the strap and the load. Make sure the protection cannot slip out as tension is applied. Tighten gradually, checking that the load remains in place and that padding has not folded or moved. More tension is not always better; delicate surfaces or hollow items can be crushed. I would recheck the setup after a short drive, because padding can settle and a strap can shift.

Ratchet straps secure cargo; they are not lifting equipment.

Route Straps Through Secure Anchor Points

Route each ratchet strap through a rated anchor point attached to the vehicle’s frame or approved cargo track. The anchor should resist the direction the load could shift, not just look sturdy. A thin rail, loose hook, or damaged tie-down can become the weak link. Check its rating and condition before tensioning. Keep the strap path direct, and protect webbing from sharp crate corners with edge guards. A strap twisted around a fitting may be harder to inspect and can wear unevenly.

The Federal Motor Carrier Safety Administration’s cargo securement rules specify that the aggregate working load limit of tiedowns must be at least half the weight of the cargo they secure. That figure is a useful reference, not a substitute for checking every component. The anchor, strap, and connector all matter. If ratings are missing or unreadable, don’t guess; use a clearly rated anchor instead. I sometimes find that the obvious attachment point is not the strongest one, so a second look is worthwhile.

Tips: Pull slack out before ratcheting. Keep the handle accessible, and check that hooks sit fully in the anchors. After a short drive, stop safely and inspect the load. A strap can settle. That detail is easy to overlook.

How to Secure a Heavy Load with Ratchet Straps — Route Straps Through Secure Anchor Points
Load Type Suggested Strap Route Anchor Point to Use Checks Before Travel
Palletized or boxed cargo Run straps over the load and down to anchor points on opposite sides. Use edge protectors where straps contact sharp corners. Rated, securely mounted tie-down rings or other designated cargo anchors. Confirm the cargo is stable, straps are not twisted, and packaging will not crush under tension.
Construction materials, such as lumber or pipe Place straps across the bundle at suitable intervals and secure each end to the vehicle. Protect straps from sharp edges and abrasion. Rated bed or trailer anchors positioned to restrain the load in the required directions. Check that individual pieces cannot slide out and that the load is contained against forward, rearward, and sideways movement as applicable.
Compact machinery or equipment Use direct tie-downs from suitable points on the equipment to separate vehicle anchors. Follow the equipment manufacturer’s instructions for approved tie-down locations. Rated equipment tie-down points and rated vehicle anchors; do not attach to controls, hoses, or unverified parts. Set brakes, secure movable components, and verify each strap and anchor is rated for its intended use.
Large, rigid item with smooth surfaces Use an appropriate combination of over-the-top and direct tie-downs to limit sliding or tipping. Add non-slip material where suitable. Secure, rated anchor points that align with the strap route and resist the expected direction of movement. Make sure the strap cannot slip off the item and that tension does not damage the load or vehicle.
Any heavy load with exposed edges Route straps clear of cutting edges, or fit edge protectors at every contact point that could abrade or cut the webbing. Use only anchors identified or rated for cargo securement; do not assume a convenient rail, hook, or body panel is load-rated. Check strap labels and working load limits, inspect webbing and hardware for damage, and recheck tension after starting the trip.

Use ratchet straps only within their marked working load limits. The required number and arrangement of tie-downs depend on the load, vehicle, and applicable regulations; never rely on unverified anchor points.

Tighten the Straps Evenly and Lock the Ratchets

How to Secure a Heavy Load with Ratchet Straps

Tighten the Straps Evenly and Lock the Ratchets

Position each strap over a firm part of the load, not a loose cover or fragile edge. Check that both hooks sit fully inside sound anchor points. If the load has sharp corners, use edge protectors to reduce cutting and abrasion. Choose straps rated for the load, and follow their labels and instructions. A strap that looks sturdy may still be unsuitable.

Tighten the straps in small, alternating steps. Bring one side snug, then adjust the opposite side so the load stays centered. Small shifts matter. Watch for cargo leaning, crushed packaging, or a strap sliding toward an edge. The aim is firm restraint, not maximum force; excessive tension can damage cargo or equipment. Once each strap is tight, close the ratchet handle fully until its lock engages. Check that the webbing lies flat and is not twisted inside the mechanism.

Pause and check.

Gently push the load from different sides; if it moves, reassess the anchor points and tension. Recheck the straps after a short distance, since settling can loosen them. Even a careful setup may need adjustment.

Inspect the Tie-Down Before and During Transport

Before loading, inspect each ratchet strap in good light. Run the webbing through your fingers and look for cuts, frayed edges, pulled stitching, melted spots, or stiff, brittle areas. Check the hooks for cracks or bending, and cycle the ratchet to confirm it moves smoothly and locks. Small damage matters. If anything looks questionable, replace the strap rather than trusting it for a heavy load. I have learned that a quick glance can miss a damaged section near a hook.

Confirm the strap’s working load limit suits the load and tie-down arrangement. Keep webbing flat, not twisted, and protect it from sharp edges with suitable edge guards. Tighten until the load is secure, without crushing fragile cargo, then lock the handle fully. Before moving, check that hooks are seated and no strap can rub against a sharp corner. Stop in a safe place shortly after departure, and inspect again after rough roads, hard turns, or sudden braking. Look for slack, shifted cargo, loosened ratchets, and fresh abrasion. Re-tension only while parked safely, keeping fingers clear of pinch points and never standing in the path of a tensioned strap. A strap can look fine at a glance. Check it closely.

FAQS

Where should I place a heavy load?

Keep it low and near the center of the truck bed or trailer. Balance the weight from side to side. Nothing should sit precariously on an edge.

How can I stop cargo from shifting?

Check whether it can roll, slide, or tip before tightening the straps. Choose strap paths that hold it down without pulling it sideways. Small shifts matter.

How do I protect straps from sharp corners?

Add suitable edge guards or padding between the webbing and sharp surfaces. Check that the protection stays in place as you tighten. It can move.

Which anchor points should I use?

Use rated anchors attached to the vehicle frame or an approved cargo track. Check their condition and ratings. A sturdy-looking rail may still be weak.

How tight should ratchet straps be?

Tighten gradually until the load is secure. Too much tension can crush hollow items or damage delicate surfaces. More force is not always better.

What should I inspect on a strap?

Look for cuts, frayed edges, damaged stitching, melted spots, or brittle areas. Check hooks for cracks or bends, and test the ratchet. A glance may miss damage.

When should I check the load again?

Stop safely after a short drive and inspect the straps and cargo. Recheck after rough roads, hard turns, or sudden braking. Padding can settle.

Can ratchet straps be used to lift cargo?

No. They are for securing cargo, not lifting equipment. Keep your fingers clear of pinch points, and never stand in the path of a tensioned strap. I still double-check that part.

Conclusion

How to secure a heavy load using ratchet straps starts with choosing straps rated for the load’s weight and checking that they are in good condition. Position the load so it is stable and balanced, then add suitable padding wherever a strap may rub against a sharp edge or delicate surface. This helps reduce movement and prevents damage during transport.

Route each strap through secure anchor points and over the load without twists. Tighten the straps gradually and evenly, keeping the load snug without overtightening or deforming it. Engage each ratchet lock before setting off. Finally, check that the load cannot shift, that the straps and anchors are secure, and that no part of the setup is worn or damaged. Stop periodically during transport to inspect the tie-downs and retighten them if needed.

Mason

Mason

Mason is a seasoned marketing professional with a deep expertise in the company's offerings and a passion for driving brand awareness. With a strong background in digital marketing strategies, he has an innate ability to connect with diverse audiences and effectively communicate product benefits.......